


When first taught to distinguish between a chemical and a physical change, students are often asked to watch out for changes that may suggest the creation of new materials. Examples include a change in temperature, formation of a precipitate, effervescence or a change in colour.
For the latter, chemists often turn to a ‘coloured beakers’ demonstration in which a series of liquids are poured one into the other to reveal a succession of impressive colour changes. The most commonly used is the ‘water into wine’ demonstration but adventurous teachers can extend this by adding a few more carefully chosen ingredients. This demonstration is based on one shown by Catherine Smith at the 2012 Association for Science Education annual conference.
Kit and preparation
- 8 dry beakers, 500 cm3 each (a large beaker makes it easier to hide the chemicals added to each in preparation)
- Beaker 1: leave empty
- Beaker 2: 20 drops of 0.4M NaOH (irritant)
- Beaker 3: 10 drops of phenolphthalein (highly flammable)
- Beaker 4: 15 drops 1M H2SO4 (irritant)
- Beaker 5: Spatula tip of solid KMnO4 (oxidising, harmful, dangerous for the environment)
- Beaker 6: 40 drops acidified iron(II) sulfate heptahydrate (you can make up a solution by dissolving 4.76 g in 10 cm3 of 1M H2SO4)
- Beaker 7: 15 drops 10% potassium thiocyanate solution
- Beaker 8: 10 drops 2% potassium hexacyanoferrate(III)
All beakers should appear empty to the audience. A dark wooden bench top is ideal for masking the contents. The audience seated with the bottom of the beakers at their eye level helps as well. When adding the relevant chemical to each beaker, it’s helpful to swirl it so that the liquids wet the glass rather than gathering in the middle.
In front of the audience

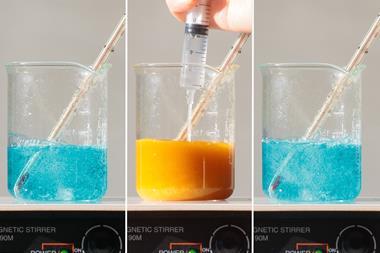
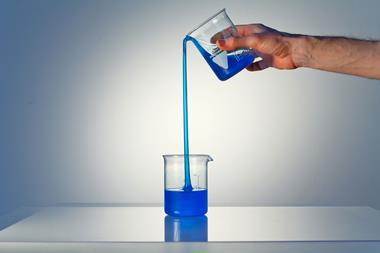
Fill beaker 1 with about 500 cm3 of tap water so the audience can see there is nothing unusual about the liquid to begin with. Pour the contents from a height of about 10 cm into beaker 2 – this helps mixing as much as possible without splashing. As the liquid is poured from one beaker to the next, a series of surprising colour changes take place:
- Beaker 1: colourless
- Beaker 2: colourless
- Beaker 3: pink
- Beaker 4: colourless
- Beaker 5: pink
- Beaker 6: colourless
- Beaker 7: orange
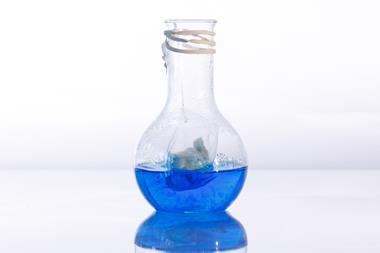
- Beaker 8: blue
Teaching goal
As the water is added to the sodium hydroxide in beaker 2, there is obviously no colour change, but on addition to beaker 3 the phenolphthalein indicator switches from its leuco form to the pink form. We’ve discussed the role that delocalisation plays in the colour of phenolphthalein before.1 The solution, once added to beaker 4, is neutralised by the acid and phenolphthalein reverts back to its leuco form. There is a large excess of hydrogen ions in the mixture as described, but with less I found the change was not instantaneous and this detracted from the spectacle.
As the liquid is added to beaker 5, the potassium manganate(VII) dissolves to give a pink colour very similar to that of the phenolphthalein. Eagle-eyed observers may spot a slight difference in hue, but for younger audiences this provides the opportunity to discuss the difference between dissolution and a chemical reaction.
Younger students will not understand the chemistry in the last few beakers (recognising the colour change is sufficient) but these are ideal for older students looking at transition metal chemistry. Initially we see a colour change as the pink MnO4– is reduced to the near-colourless Mn2+. The [Fe(H2O)6]2+ complex is in turn oxidised to [Fe(H2O)6]3+, both of which are effectively colourless at this concentration, to provide the Fe(iii) needed for the next beaker.
Adding this to the potassium thiocyanate produces the familiar blood red colour (appearing more orange at this concentration) as the SCN– ligand replaces one of the water ligands. The new International Baccalaureate syllabus requires students to be familiar with the spectrochemical series. Teachers might be tempted to emphasise the drop in frequency of light absorbed and corresponding shift in colour from yellow–orange to blood red–orange, claiming this is due to the exchange of water for a weaker field ligand.
[Fe(H2O)6]3+ + SCN– → [Fe(H2O)5SCN]2+ + H2O
In reality, this and the colour in the next beaker are due to charge transfer processes, which are often associated with vibrant colours even at low concentrations. Here, most light is absorbed as an electron is transferred from the ligand to the metal ion rather than between split d sub shells on the iron itself. Charge transfer also accounts for the surprisingly strong colour of the highly oxidised MnO4– ion seen earlier as well as other classic examples such as the colour of sapphires and brown glass.
The final reaction is, to me, the most intriguing as we generate Prussian blue, Fe4[Fe(CN)6]3. The blue mixed-oxidation state complex of Fe(III) and Fe(II) with cyanide ligands was one of the earliest synthetic pigments; its blue colour inspired Gay-Lussac when naming cyanide, and gave the cyanotype process its name. In the latter, visible light is enough to reduce some Fe(III) to Fe(II) in a mixture of potassium ferricyanide and ferric ammonium citrate, resulting in the formation of the bright blue pigment. Once again, we see a transition metal compound whose strong colour arises not from crystal field effects but from charge transfer (intervalence in this case); light is primarily absorbed as electrons are exchanged between the Fe(III) and Fe(II) ions rather than between split d levels within either metal ion.
Safety and disposal
- Wear eye protection.
- All liquids can be disposed of down the sink with plenty of water.
- Phenolphthalein could be made up in ethanol, or industrial denatured alcohol (IDA), which is more dangerous. If made up in IDA, it is an eye irritant, harmful by ingestion, causes damage to the optic nerve, CNS and other organs on prolonged exposure.
References
- Education in Chemistry, July 2014, p11 (Brilliant bubbles and disappearing dyes)


No comments yet